Stepping into an RV on a scorching day can feel like walking into an oven on wheels. A reliable RV air conditioning system is the difference between roasting and relaxing. In fact, an RV’s air conditioner is often the single largest power draw on board. Without the right cooling capacity and power planning, your mobile home can quickly overheat. This guide will show you how RV cooling systems work, how much power they need, and what to do to keep yours running efficiently and quietly on the road.
| Attribute | Typical Value |
|---|---|
| Cooling Capacity | 5,000–15,000 BTU (most common RV units) |
| Running Power | ~1,000–2,000 W (≈12–16 A at 115 V) |
| Startup Surge | Often 2–3× running amps (>30 A) |
| Voltage | 115 V AC (standard shore power) |
| Power Source | Shore power, generator, inverter (battery/solar) |
| Maintenance | Clean filters monthly; vacuum coils yearly |
| Typical Weight | 60–80 lbs (rooftop units) |
Types of RV Air Conditioning Systems
RVers can choose from roof-mounted, basement/ducted, portable, or even evaporative cooling systems. Each has its pros and cons:
Rooftop Air Conditioners
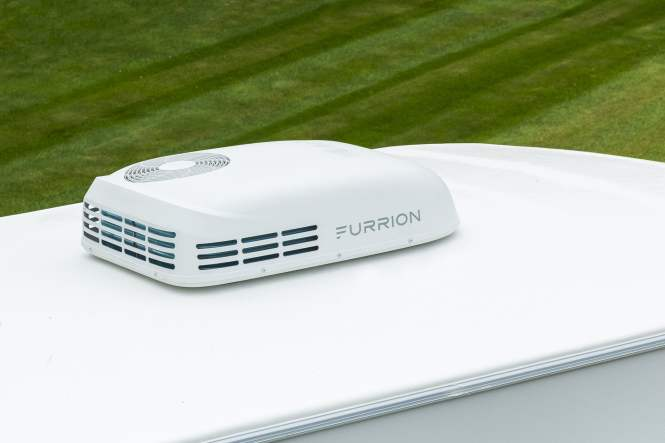
Most RVs use a standard roof-mounted air conditioner. These self-contained units sit on the roof and dump heat outside, cooling the cabin with a single vent (non-ducted) or multiple vents (ducted). Common brands include Dometic, Coleman, Atwood, and Furrion. They come in BTU ratings from about 5,000 up to 15,000 BTU. A typical 13,500–15,000 BTU rooftop unit will draw roughly 12–16 amps at 115 V when running – that’s about 1,500–1,900 W of power. At startup, draw can spike over 30 amps, which is why many RVers use a soft starter to smooth the surge. Standard-profile rooftop units are relatively tall, but newer low-profile models are shallower for better aerodynamics. Low-profile ACs pack similar cooling power into a compact design, reducing wind drag on your RV and often improving fuel mileage. However, their smaller compressors may limit peak cooling in very large rigs or extreme heat.
Why rooftop? Roof units free up interior space and are built ruggedly. They’re relatively easy to install (they all fit a standard 14″×14″ opening) and serviceable by climbing on the roof. When shopping, note whether a model has a heat pump or electric heat strip (for mild heating), and whether it’s ducted or non-ducted. Non-ducted units simply blow through a vent in one room; ducted systems use hidden ducts to spread cool air into multiple zones (like bedroom and kitchen). Ducted ACs feel more even but need extra power to push air through vents, and they cost more to install.
Basement and Ducted Systems
For larger Class-A motorhomes or big 5th-wheels, some manufacturers offer basement air conditioners. These units mount under the RV floor instead of on top. By eliminating roof height, they avoid bridge/overhang concerns and free roof space for solar panels. Noise is also lower: the compressor and fan are tucked away underneath, so you barely hear it inside. Another advantage is easy maintenance access – no ladder needed to service a basement unit. On the downside, basement ACs are rare and more complex to install. They usually work with a ducted system, so installation and insulation must be done right for efficient cooling.
A ducted rooftop AC is another option: the evaporator hangs under the ceiling with supply vents in each room. These systems provide very even cooling throughout the RV and tend to be quieter inside. But like basement setups, ducted systems use more power and cost more in both unit and installation. They also require careful sealing of the ducts; leaks or poor insulation can greatly reduce performance.
Portable and Evaporative Coolers
Some RVers supplement or replace roof ACs with portable units or evaporative coolers. A portable air conditioner (like a suitcase unit) sits inside and vents hot air out a window. These are easy to install but much less efficient – they still pull in warm outdoor air, so they work only in mild conditions.
Evaporative coolers (aka “swamp coolers”) are a niche alternative. They use water evaporation to cool the air, and run on 12 V or 115 V. In very dry climates, a good evaporative cooler can be surprisingly effective and uses far less power. (Some are roof-mounted and look like AC units, but they have a water pump and cooling pads.) However, they lose efficiency in humid air since adding moisture only helps when the outside air is dry. You also must keep a reservoir filled and crack windows for airflow – not ideal when you wanted a fully sealed, A/C-cooled cabin. In short, evaporative cooling is energy-efficient but really only right for hot-arid conditions. For most campers, a normal refrigerant AC is more dependable.
Inverter & Specialized Units
Innovation is arriving in RV cooling. For example, TURBRO and others now offer inverter-type RV ACs. Inverter units modulate the compressor speed, running continuously at variable power instead of constant on/off. This yields quieter startup and operation, faster cooling, and better efficiency. The latest inverter RV ACs often support WiFi control and draw less current during startup. There are also combined AC/heater models (heat pumps) that can warm the coach in mild winter weather, reducing propane furnace use.
To summarize, your choice depends on your RV size and power situation:
-
Standard rooftop AC: proven cooling, widely available, works for most.
-
Low-profile rooftop AC: same cooling, less drag/height, a bit pricier.
-
Ducted/under-floor AC: even, quiet cooling for big RVs, but costly and power-hungry.
-
Portable/swamp cooler: supplemental or dry-climate option, low cost/power, but not for humid heat.
-
Inverter AC: premium tech, lots of features, better energy savings, but higher upfront price.
Power and Efficiency
A key part of RV AC is power planning. These units draw a lot of electricity – typically 12–16 A at 115 V during normal cooling. For example, data show a 13,500 BTU rooftop unit needs about 1,500 W to run, while a 15,000 BTU model may need 1,900 W. Starting the compressor can briefly spike that to over 30 A. For that reason, many RVs with a single 15k BTU AC stay on 30-amp shore power or use a 3.5 kW+ generator. (Doubling up with two ACs requires a 50 A system or ~5 kW generator.)
Running vs. startup watts: AC specs often list two wattages. The running wattage is what the unit needs to stay on – usually about half of the startup requirement. For example, Renogy’s data shows a 13.5k BTU AC uses ~1,500 W steady and ~2,700 W to start. Most electronics double or triple amps at startup. To avoid tripping breakers or stalling generators, RVers often install a soft starter device. A soft start cuts the surge by 60–70%, allowing your RV to run AC on a smaller generator or 30 A shore power.
Maximizing efficiency: Because ACs use so much power, it pays to minimize losses. A well-insulated RV keeps cold air in, which means the AC can cycle less often. Park in the shade or use reflective sun screens to cut solar gain. Run ceiling or portable fans to circulate air – moving air feels cooler and lets you set the thermostat higher. If you can, turn on the AC during the cooler morning/evening hours to ease the load. All of these steps reduce how long and hard the AC must run. In practice, RV experts recommend:
-
Improve insulation: Seal leaks and add window covers so heat stays out.
-
Use shade and fans: Park under trees or use awnings; ceiling fans help distribute cool air.
-
Schedule wisely: Run the AC before the hottest part of the day (morning/evening) to avoid constant high load.
Many RVers also add solar panels and batteries to offset AC power draw. For true boondocking, a high-wattage generator or large inverter/solar setup is usually needed to run an AC all day. Without it, some campers resort to only 12 V fans or propane fridges when off-grid to avoid running the AC.
Maintenance & Care
Even the best AC needs upkeep. A clean, well-sealed unit cools better, uses less power, and lasts longer. Routine maintenance includes:
-
Cleaning or replacing the air filter: Most rooftop ACs have a foam or pleated filter. Wash or replace it monthly during hot weather to keep airflow high. A dirty filter forces the blower to work harder and reduces cooling. Keystone RV recommends checking filters in spring and fall, with additional checks in dusty conditions.
-
Cleaning the coils: Every year (spring and/or fall), remove the shroud on the roof unit and vacuum or blow debris off the evaporator and condenser coils. Clear leaves, bugs, or gunk. If fins are bent, straighten them with a fin comb. This keeps heat exchange efficient.
-
Inspecting seals and gaskets: Check the foam gasket that seals the AC to the roof and any foil tape around vents. Over time these crack or shrink and let hot air in. Reseal or replace the foam/foil as needed. This simple step prevents cool air leaks.
-
Lubricating and tight checks: Some rooftop ACs have a fan motor that can benefit from a drop of oil annually. Also inspect electrical connections for corrosion, and ensure roof bolts are tight to prevent rattles.
Neglecting maintenance can lead to reduced capacity and higher amps draw. A clogged filter or dirty evaporator coil will make the AC work overtime and possibly trip breakers. By following the steps above each season, you’ll ensure your RV AC remains efficient and reliable.
Choosing the Right RV Air Conditioner
When picking an RV AC, size matters. Too small a unit will struggle on hot days; too big and you waste power and money. As a rule of thumb, about 20 BTU per square foot of RV interior is needed for moderate cooling. A 300 sq.ft. Class A might use a 15,000 BTU unit, whereas a 20-foot camper (~160 sq.ft.) might use 8,000–10,000 BTU. Always check manufacturer sizing charts, and remember insulation quality affects this.
Also match your electrical system: a 30 A rig with one AC can handle up to ~15,000 BTU (with a smart start), but dual ACs require 50 A service or multiple generators. Consider modern features too: a digital thermostat or Wi-Fi control can add convenience.
Finally, shop by brand reputation and warranty. Dometic and Coleman Mach are long-time RV AC makers; Furrion and Turbro are newer players pushing tech innovations. Read reviews for cooling performance and noise levels – a good AC should cool quickly, quietly, and handle humidity (especially if you camp in muggy regions).
Whether you’re parking by a lake in the desert or boondocking in the woods, the right RV air conditioning setup will keep your home-on-wheels comfortable. With proper selection, installation, and upkeep, you can enjoy cool, refreshing air even as the mercury rises outside. Happy camping!