How to Get Rid of Mold — The Complete Guide to Safe Removal and Prevention
Mold doesn’t knock before it enters your home. It slips in through a leaky pipe, a poorly ventilated bathroom, a damp basement corner — and before you notice it, it’s already spreading. Learning how to get rid of mold is one of the most important home health skills any homeowner or renter can have. It’s not just about appearances. Approximately 70% of homes have some form of mold hiding somewhere inside them — and the health consequences of ignoring it range from minor allergies all the way to serious respiratory damage.
This guide covers everything: what mold actually is, the different types, how to remove it safely from every surface, and how to stop it from coming back for good.
What Mold Actually Is
Mold is a fungus. It reproduces by releasing microscopic spores into the air that travel through open windows, ventilation systems, clothing, and even on your pets. The most common indoor molds are Cladosporium, Penicillium, and Aspergillus — and every single one of them needs the same thing to thrive: moisture. Take away the moisture and mold has no future. Leave it and mold spreads faster than most people expect.
Why Mold Grows Indoors
Flooding, leaky pipes, high humidity, and poor ventilation are the four main drivers of indoor mold growth. Mold forms on damp materials and in decaying organic matter — and it spreads aggressively on porous surfaces like the paper facing of wet drywall. That’s why bathrooms, kitchens, basements, and crawl spaces are the most common problem areas. They combine warmth with persistent moisture, which is exactly the environment mold needs to colonize a surface and keep spreading.
How Fast Mold Actually Spreads
Speed matters with mold. Most surfaces develop visible mold growth within 24 to 48 hours of sustained moisture exposure. A small patch ignored for two weeks can cover an entire wall section within a month. When water leaks or spills occur indoors, mold damages what it grows on — and the longer it grows, the more damage it causes. Acting early is always cheaper, safer, and far less disruptive than dealing with an advanced infestation that has spread behind walls and under floors.
Types of Mold You Will Find at Home
Not every mold patch is the same. Color and texture give you useful clues — though color alone won’t definitively identify a species. What matters most is taking any mold growth seriously regardless of what it looks like or how small it currently appears.
Black Mold — The Most Dangerous Type
Stachybotrys chartarum is the scientific name for what most people call black mold. It’s a greenish-black, slimy-looking fungus that grows on materials with high cellulose content — fiberboard, gypsum drywall, paper, and wood — and requires constant moisture to survive. What makes it genuinely dangerous is that it produces mycotoxins — chemical compounds that remain hazardous even after the mold itself is cleaned away. Neurological symptoms including confusion, brain fog, dizziness, and memory loss have all been linked specifically to black mold exposure. If you suspect black mold anywhere in your home, don’t attempt DIY removal — call a certified remediation professional immediately.
Green Mold and What It Means
Green mold is the most commonly found color of mold in residential homes. It refers to numerous fungal species ranging from bright green to darker olive varieties that appear soft and powdery on surfaces. The three most common green mold species are Aspergillus, Cladosporium, and Penicillium. All three cause respiratory irritation and allergic reactions with regular exposure — none of them should be left untreated simply because they aren’t black.
White Mold — Easy to Misidentify
White mold looks powdery or filmy and is frequently mistaken for efflorescence — a harmless mineral deposit that forms on concrete and masonry walls. The key difference is that efflorescence doesn’t grow and has no smell. White mold spreads over time and produces a musty odor. Unlike efflorescence, white mold causes genuine health problems if regularly inhaled or touched. When in doubt, treat any white fuzzy growth on a damp wall as mold until you can confirm otherwise.
Health Risks of Mold Exposure
Mold isn’t just ugly. It’s a genuine health threat — especially for children, the elderly, and anyone with a pre-existing respiratory condition. Understanding what prolonged mold exposure does to the body is reason enough to deal with it the moment you find it.
Respiratory and Allergic Reactions
For many people, mold causes a stuffy nose, sore throat, persistent coughing or wheezing, burning eyes, and skin rashes. People with asthma or mold allergies can experience severe reactions from even brief exposure. Of the 21.8 million people in the United States reported to have asthma, approximately 4.6 million cases are estimated by the EPA to be directly attributable to dampness and mold exposure in the home. That number puts the real cost of an ignored damp corner into stark perspective.
Neurological and Long-Term Damage
The damage mold causes doesn’t stop at the lungs. Extended mold exposure has been linked to short-term memory loss, lightheadedness, blurred vision, ringing in the ears, and a persistent cognitive cloudiness commonly described as brain fog. Studies have also connected long-term mold exposure to increased rates of depression and anxiety in both adults and children. Infants exposed to significant mold in their first year of life have nearly three times the risk of developing asthma compared to infants raised in mold-free environments. These are not minor inconveniences — they’re serious, long-term health consequences that make prompt removal essential.
Safety Gear Before You Start Cleaning
Never clean mold without proper protection. Disturbing a mold colony releases thousands of spores into the air and those spores go directly into your lungs, eyes, and onto your skin if you’re not properly covered. Skipping protective gear to save time is never worth it.
What You Must Wear
Wear at minimum an N95 respirator mask approved by NIOSH to protect your mouth and nose from airborne spores. Add protective gloves made from nitrile, vinyl, or rubber — not latex. Wear goggles that seal completely around the eyes to block out fine particles. Cover all exposed skin with long sleeves and old clothing you plan to wash immediately after the job is done. Bag all disposable materials — gloves, rags, cut-out drywall — in sealed plastic bags before placing them in the trash.
Who Should Stay Out of the Area
People with allergies, immune suppression, asthma, COPD, or any underlying lung disease should not participate in mold cleanup under any circumstances. The risk of severe allergic reaction or fungal infection in these individuals is significantly elevated compared to healthy adults. If anyone in your household falls into one of these categories, they need to stay completely out of the affected space until the cleanup is finished and the area has been thoroughly ventilated.
How to Get Rid of Mold — Surface by Surface
Different surfaces and different locations need slightly different approaches. The core principle stays the same everywhere — remove the mold completely, dry the surface thoroughly, and eliminate the moisture source driving the growth. Here’s exactly how to handle each situation.
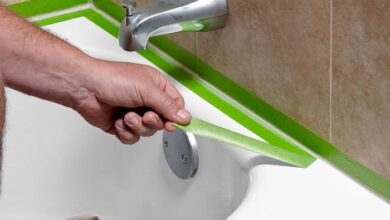
How to Get Rid of Mold on Bathroom Walls and Tiles
Bathrooms are ground zero for household mold. Steam from showers, poor ventilation, and constant humidity create perfect growing conditions on grout lines, caulk seams, tile surfaces, and the drywall hidden behind fixtures. Open the bathroom window and run the exhaust fan before touching anything.
Mix one cup of bleach into one gallon of water. Apply this solution to the affected surfaces with a stiff brush or sponge, scrub firmly into grout lines and corners, then let the solution sit for a full 15 minutes before rinsing with clean water. For stubborn grout mold, an old toothbrush reaches where a broad brush can’t. Never mix bleach with ammonia or any other cleaning product — the combination produces toxic chloramine vapors that cause serious respiratory damage even in brief exposure.
How to Get Rid of Mold on Drywall
Drywall is porous. Mold doesn’t just sit on the surface — it penetrates into the material itself and grows through the gypsum and paper layers. Absorbent materials like drywall, ceiling tiles, and insulation often have to be removed entirely when mold growth is present because complete removal from inside the material is practically impossible through surface cleaning alone. If the drywall is soft, discolored with dark staining, or smells musty even after scrubbing, replacement is the correct decision — not more cleaning attempts.
For surface mold on otherwise structurally solid drywall, use a commercial mold remover or diluted detergent solution. Scrub the affected area, dry it thoroughly with fans and a dehumidifier, and treat with a mold-inhibiting primer before any repainting. Never paint directly over visible mold — paint applied over active mold growth will peel within weeks and the mold underneath continues spreading completely undisturbed.
How to Get Rid of Mold in Basements
Basements trap moisture from foundation walls, poor drainage, groundwater seepage, and condensation forming on cold concrete surfaces. The cleaning process starts before any scrubbing begins — identify and fix the moisture entry point first. Without that step, every cleaning effort is temporary.
Run a dehumidifier continuously during and after cleanup to bring indoor humidity below 50%. Clean visible mold from concrete walls with a stiff brush and a strong detergent or diluted bleach solution. For wood framing in basements showing mold growth, treat the cleaned surface with a borate-based wood preservative — it prevents regrowth without the harshness of repeated bleach applications and penetrates the wood grain where surface sprays can’t reach.
How to Get Rid of Mold on Wood
Wood is one of the hardest surfaces to fully remediate because mold penetrates deeply into the grain. If the wood shows signs of rot alongside the mold — soft spots, structural weakness, crumbling fibers — it needs to be replaced entirely. No amount of cleaning reverses structural wood rot.
For surface mold on solid, structurally sound wood, sand the affected area with 80-grit sandpaper, wipe the surface clean, apply a diluted bleach solution or undiluted white vinegar, and allow it to dry completely. Seal the cleaned surface with a mold-resistant wood primer or borate treatment before painting or finishing. Keep the area ventilated during and after the process to ensure complete drying.
How to Get Rid of Mold on Carpets and Fabric
Carpets with significant mold growth rarely survive remediation. The fibers hold moisture deep in the backing and padding where cleaning solutions simply cannot penetrate effectively. Cutting the loss and replacing the carpet is smarter than spending hours on a deep clean that won’t eliminate the mold buried in the padding below. For small fabric items like cushion covers, curtains, or clothing with surface mold, machine wash in the hottest water the fabric tolerates with one cup of white vinegar added to the cycle.
Natural Cleaning Solutions That Actually Work
Not every mold situation calls for bleach. Natural alternatives work effectively on surface mold — especially useful in households with young children, pets, or residents sensitive to harsh chemical fumes.
White Vinegar
Undiluted white vinegar is one of the most effective natural mold killers available in any kitchen. Spray it directly onto the affected surface, leave it for a full hour without rinsing, then scrub and wipe clean. Its mild acetic acid disrupts mold’s cellular structure and kills approximately 82% of known mold species on contact. The sharp smell dissipates completely within a few hours of application.
Baking Soda
Baking soda attacks mold differently from vinegar — it raises the surface pH to a level that mold cannot tolerate for growth. Dissolve two tablespoons of baking soda in two cups of water in a spray bottle, spray onto the moldy surface, scrub firmly with a brush, rinse with clean water, then spray again and allow it to air dry. The thin residue left behind after drying actively discourages mold from returning to that surface. It’s gentle enough to use around children and pets, making it a strong first choice for minor bathroom grout or kitchen surface mold.
Tea Tree Oil
A few drops of tea tree oil diluted in water creates a potent antifungal spray that works effectively on surface mold without the harshness of bleach or the strong smell of vinegar. It’s more expensive per application than other natural options but performs well on smaller problem areas and simultaneously neutralizes the musty odors that accompany mold growth. Use about 10 drops per cup of water, spray onto the affected surface, and leave it without rinsing.
Case Study — Bathroom Mold After a Slow Pipe Leak
A homeowner discovers dark mold patches spreading across two bathroom walls and behind the vanity cabinet — the result of a slow supply line leak that went undetected for several months. The affected area covers roughly 6 square feet of drywall and extensive grout lines throughout the tile surround.
How the Repair Was Handled
The homeowner sealed the bathroom doorway with plastic sheeting to contain spores during the cleanup process. Wore an N95 mask, nitrile gloves, and sealed goggles throughout every stage of the work. Removed and double-bagged the water-damaged drywall section behind the vanity — it had gone soft throughout and surface cleaning would have been pointless. Scrubbed all tile surfaces and grout lines with diluted bleach solution using an old toothbrush for the grout. Replaced the damaged drywall section, primed the new installation with mold-resistant primer, and repainted. Fixed the supply line leak as the very first step before any cleaning began.
Why It Worked Permanently
Total material cost came to under $85. The mold did not return. The single most important decision the homeowner made was fixing the leak first — before touching the mold at all. Without eliminating the moisture source, the same mold would have been back within three to four weeks regardless of how thoroughly the surfaces were cleaned. Moisture first, mold second — in that order, every time.
The Most Common Mold Removal Mistakes
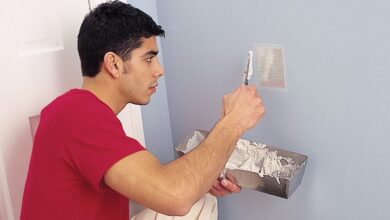
Painting Over Mold Without Cleaning First
This is the most widespread mistake homeowners make. Paint applied over active mold growth looks fine for a few weeks then peels, bubbles, and reveals spreading mold underneath. The mold was never killed — it was just temporarily hidden. Always clean and dry the surface completely, treat with mold-inhibiting primer, and only then apply paint.
Not Fixing the Moisture Source Before Cleaning
Cleaning mold without fixing the underlying moisture problem is like mopping the floor with the tap still running. The mold returns within weeks every single time. Identify the source — leaky pipe, poor ventilation, condensation, foundation seepage — and fix it before any remediation work begins. This single step is what separates a permanent fix from a temporary one.
Using a Regular Vacuum on Mold
A standard household vacuum pulls mold spores off the surface and blasts them straight back into the room through the exhaust. This spreads the contamination rather than removing it. If vacuuming is necessary during mold cleanup, use only a vacuum fitted with a HEPA filter capable of trapping particles as small as 0.3 microns — the size range where mold spores sit.
How to Prevent Mold From Coming Back
Removal fixes the symptom. Prevention fixes the actual problem. Without addressing the underlying moisture conditions in your home, mold returns repeatedly regardless of how thoroughly you clean it each time.
Control Humidity Year-Round
Keep indoor humidity consistently below 50% throughout the day. An air conditioner handles this in summer. A dehumidifier handles it in winter and in spaces like basements that air conditioning doesn’t reach effectively. A basic hygrometer costs under $15 at any hardware store and gives you a real-time humidity reading for any room in the house. Run bathroom exhaust fans for at least 15 minutes after every shower — not just during the shower itself — to clear the remaining moisture-laden air from the space.
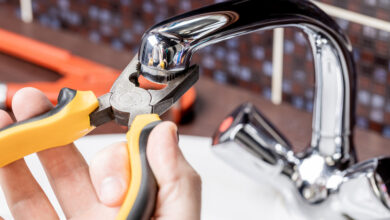
Fix Every Leak Immediately
A dripping pipe under a kitchen sink, a slow roof leak, a window that lets rain seep through the frame — every one of these is a mold incubator in waiting. The 24-to-48-hour window after any water intrusion is critical. Dry everything completely within that window and mold never gets the foothold it needs to establish a colony. Beyond that window, the odds of mold development increase dramatically with every passing hour.
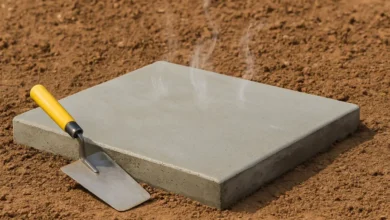
Choose Mold-Resistant Building Materials
When repairing or renovating any part of your home, choose mold-resistant drywall — commonly sold as green board or purple board — in bathrooms, laundry rooms, and basements. Pair it with mold-resistant primer and paint in high-humidity spaces for maximum protection. These products cost modestly more upfront but eliminate the repeated cost, disruption, and health risk of dealing with mold remediation over and over in the same locations.
When to Call a Professional
Most small mold problems are firmly in DIY territory. But there is a clear line where professional help becomes necessary rather than optional — and crossing it without expert assistance creates serious health and structural risks.
The 10 Square Foot Rule
The EPA’s general guideline is straightforward — if the moldy area is smaller than roughly 10 square feet, a healthy adult can handle removal independently with proper protective gear and the right cleaning approach. Anything larger than that threshold, or any situation involving suspected black mold, sewage contamination, or mold discovered inside an HVAC system, requires a certified mold remediation professional with commercial-grade equipment and containment protocols.
Signs That Require Professional Assessment
Call a professional if mold keeps returning to the same area despite repeated thorough cleaning — this signals a hidden moisture source you haven’t found yet. Call if you can smell a persistent musty odor but can’t locate visible mold — it’s almost certainly growing behind walls or under floors. Call if household members experience unexplained respiratory symptoms, headaches, or cognitive issues that consistently improve when they spend time away from the building. That last pattern — symptoms that resolve away from home — is one of the most reliable indicators of a serious hidden mold problem that DIY methods will never adequately address.
Final Word
How to get rid of mold permanently always follows the same sequence — fix the moisture source first, remove the mold completely, dry everything thoroughly, and then prevent recurrence by controlling humidity and improving ventilation. Skip any one of those four steps and mold wins the next round without question. Follow all of them in the right order and it doesn’t come back. The house stays healthy. The air stays clean. And that damp corner never becomes a $6,000 remediation problem.