That drip. That constant, maddening drip coming from your kitchen or bathroom faucet at 2 AM. You try ignoring it. You can’t. And what makes it worse is knowing that every single drip is money leaving your pocket — silently, steadily, without asking permission. Learning how to fix a leaky faucet is one of the smartest and most practical things a homeowner can do — not just to stop the noise, but to stop the financial bleeding that comes with it.
According to the EPA, a faucet dripping at just one drip per second wastes more than 3,000 gallons of water every single year. That’s enough water to take over 180 showers. The average American household wastes 9,400 gallons annually from leaks alone — and 10% of homes waste 90 gallons or more every single day. Fix a leaky faucet today and that waste stops permanently.
What a Leaky Faucet Actually Costs You
Most homeowners underestimate the real damage a dripping faucet does. It’s not just the noise — it’s your water bill, your pipes, and eventually your cabinet structure underneath the sink.
The Water Waste Numbers Are Staggering
One drip per second equals 3,000 gallons wasted per year. Two faucets dripping at 20 drips per minute waste 1,388 gallons annually. Three faucets dripping at two drips per second lose 34.2 gallons every single day. A fast drip running at 120 drips per minute can add $200 directly onto your monthly water bill — not over a year, every month. Fixing household leaks saves homeowners approximately 10% on their water bills according to EPA data. That’s real money sitting in your faucet doing nothing useful.
The Hidden Damage Nobody Talks About
A leaky faucet under a kitchen sink slowly saturates the cabinet floor below it. Within months that moisture creates mold, warps the wood, and eventually damages the structural support of the countertop above. What starts as a $15 washer repair quietly becomes a $400 cabinet replacement if left long enough. The drip isn’t just annoying — it’s a slow demolition happening inside your home.
Know Your Faucet Before You Touch Anything
This is where most DIY faucet repair guides fail you. They jump straight into tools without explaining that the repair process is completely different depending on what type of faucet you have. Get the type wrong and you’ll buy the wrong parts, take apart the wrong components, and end up with a worse leak than when you started.
The Four Faucet Types Explained Simply
There are exactly four types of faucets found in residential homes. Every kitchen sink, bathroom vanity, bathtub, and utility room fixture falls into one of these categories — no exceptions.
Compression faucets are the oldest design still in widespread use. They have two separate handles — one hot, one cold — and work by physically pressing a rubber washer down against a valve seat to stop water flow. You can identify one instantly by the tight, grinding rotation required to fully shut off the water. They’re the most prone to leaking of all four types because the rubber washer grinds against the seat every single time the handle is turned. Most compression faucet leaks cost under $5 to fix — just a new washer and some plumber’s grease.
Ball faucets are the single-handle style most commonly found in kitchen sinks across the US. A rotating slotted metal ball inside the faucet body controls both flow and temperature simultaneously. Delta pioneered this design. The ball has more moving parts than any other faucet type — springs, rubber seats, O-rings, and the ball itself — which means more things that can eventually wear out and cause leaks. Ball faucet repair kits run $10 to $20 and contain every part you’ll need.
Cartridge faucets come in both single and double-handle configurations and are among the most common faucets in modern bathrooms. A hollow cartridge stem moves up and down inside a sleeve to control flow and temperature. They have very few moving parts which makes them highly reliable. When they leak, the fix is almost always simply pulling out the old cartridge and dropping in a new one — a 10-minute job once you have the right replacement cartridge in hand.
Ceramic disc faucets are the newest and most durable design available. A single wide lever sits on top of a thick cylindrical body. Inside, two precision-fired ceramic discs rotate against each other — one fixed, one movable — with matching holes that align to allow water through. Ceramic disc valves are considered the longest lasting and most leak-proof of all faucet types. They rarely need repair at all. When they do drip, the cause is almost always mineral buildup on the disc surfaces rather than worn parts.
How to Identify Your Faucet Type in 60 Seconds
Stand at your sink and observe. Two handles that require a firm, grinding twist to shut off completely means compression. A single handle that rotates in every direction over a rounded cap means ball faucet. A single or double handle that moves smoothly and precisely with a cartridge feel means cartridge faucet. A single lever on top of a thick, wide cylindrical body means ceramic disc. That’s it. You now know exactly what repair you’re facing.
Tools and Materials — Matched to Your Faucet Type
Buying the wrong parts is the most common reason DIY faucet repairs fail or have to be repeated. Every faucet type needs different replacement components. Here’s exactly what to get before you start — nothing more, nothing less.
For Compression Faucets
A flathead and Phillips screwdriver, an adjustable wrench, replacement rubber washers in multiple sizes, replacement O-rings, plumber’s grease, and seat wrench if the valve seat needs replacement. The washers cost under $3 for a full assortment pack. Take the old washer to the hardware store to match the size exactly — only a perfect fit creates a proper seal.
For Ball Faucets
An adjustable wrench, Allen wrench set, needle-nose pliers, and a brand-specific ball faucet repair kit. Always buy the repair kit rather than individual parts — it contains new springs, rubber seats, O-rings, and a replacement ball in one package for under $15. Brand matters here. Delta, Moen, and Kohler all use different ball assemblies. Check the faucet brand before shopping.
For Cartridge Faucets
An adjustable wrench, flathead screwdriver, needle-nose pliers, and the exact replacement cartridge for your faucet model. Cartridges are brand and model specific — Moen cartridges don’t fit Price Pfister bodies. Pull the old cartridge out and take it to the hardware store for a direct match, or photograph the faucet brand and look up the model number online. Replacement cartridges typically cost $10 to $25.
For Ceramic Disc Faucets
An Allen wrench, flathead screwdriver, white vinegar, and replacement neoprene seals or the full ceramic cartridge. Most ceramic disc leaks are caused by mineral deposits on the disc surfaces rather than worn parts — meaning cleaning is often all that’s needed. Have a replacement cartridge on standby in case cleaning doesn’t solve it. Ceramic disc cartridges cost $20 to $40 but last a decade or longer.
Before Touching Any Faucet — The Non-Negotiable First Step
Shut off the water supply. This sounds obvious but it gets skipped more than you’d believe — and the result is exactly what you’d imagine. The shut-off valves sit directly beneath the sink, one for hot and one for cold. Turn both clockwise until they stop. Then open the faucet handles to release any residual water and pressure still sitting in the line. Plug the drain with a stopper or push a folded towel over it — faucet repairs involve tiny screws, springs, and O-rings that disappear down drains instantly. Finally, lay a towel in the basin to catch dropped parts and protect the sink surface. All of this takes two minutes and saves you from a very wet, very avoidable disaster.
How to Fix a Leaky Faucet — Compression Type
Compression faucet leaks almost always come from a worn rubber washer at the bottom of the stem. That washer gets compressed thousands of times a year and eventually deforms, hardens, or cracks — and water starts pushing past it.
Removing the Handle and Stem
Pry off the decorative cap on top of the handle — it usually has an H or C marking. Underneath sits a screw. Remove it and pull the handle straight up. Beneath the handle is the packing nut. Fit your adjustable wrench to it and loosen it counterclockwise. Once loose, unscrew it by hand and lift the entire stem assembly straight out of the faucet body.
Replacing the Washer and O-Ring
Look at the bottom of the stem — a rubber seat washer is held in place by a brass screw. Remove the screw, pop out the old washer, and compare it to your assortment. The replacement must match in diameter and thickness exactly — even a slightly wrong size will leak. Coat the new washer lightly with plumber’s grease before installing it. While the stem is out, slide off the O-ring around the stem body and replace it too. O-rings cause handle leaks — washers cause spout leaks — replacing both at the same time means you won’t be back inside this faucet again for years.
Checking the Valve Seat
The valve seat is the small concave ring inside the faucet body where the washer presses down to stop flow. Run your finger around it. If it feels rough, pitted, or corroded, the new washer will wear out just as fast as the old one. A seat wrench removes and replaces it for under $3. This is the repair step almost every basic guide skips — and it’s exactly why some compression faucets keep leaking after a washer replacement.
Reassembly and Testing
Thread the stem back in, tighten the packing nut snugly — never overtighten it — replace the handle, tighten the screw, and press the cap back on. Slowly open the shut-off valves. Turn the faucet on and off a few times. No drip means a perfect repair.
How to Fix a Leaky Faucet — Ball Type
Ball faucet leaks come from multiple sources simultaneously — worn springs, damaged rubber seats, cracked O-rings, or a scored ball surface. This is why a full repair kit beats replacing individual parts every time. You fix everything at once rather than discovering a new leak component two weeks after the first repair.
Disassembly Step by Step
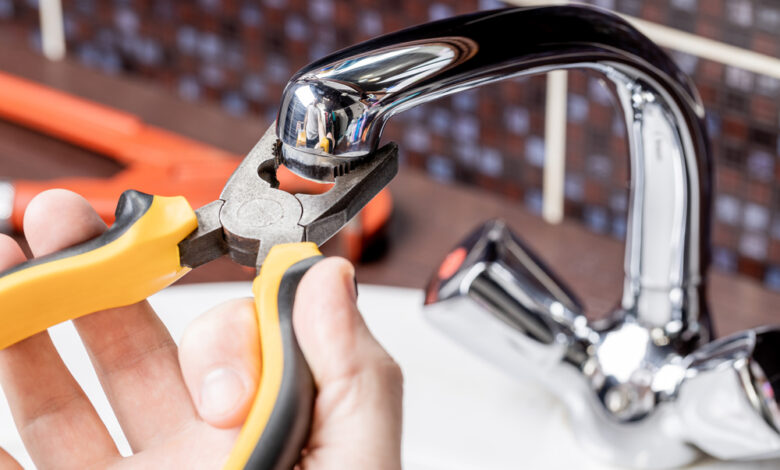
Remove the decorative cap and loosen the handle screw with an Allen wrench. Lift the handle straight off. Use locking-jaw pliers wrapped in duct tape to protect the finish and unscrew the cap. Lift out the collar and plastic cam. Now the ball is visible — pull it straight out. Underneath the ball sit two small rubber seats each sitting on a spring — use needle-nose pliers or a small screwdriver to pop both out. Finally, use a small hook tool to remove the O-rings from around the faucet body. Lay all parts in the order you removed them on a clean towel — this makes reassembly straightforward.
Installing the New Parts
Coat the new O-rings in plumber’s grease before pressing them into their grooves on the faucet body. Drop new springs into the inlet seats, place new rubber seats on top of each spring, and carefully position the new ball — lining up the ball’s slot with the pin inside the faucet body. This alignment is critical — a misaligned ball won’t shut off cleanly. Replace the cam and collar, tighten the cap, and reattach the handle.
How to Fix a Leaky Faucet — Cartridge Type
Cartridge faucets are the most straightforward repair of all four types. The cartridge does everything — controls flow, controls temperature, creates the seal. When it fails, the entire cartridge comes out and a new one goes in. No individual components to match, no multiple parts to source.
Pulling the Old Cartridge
Remove the handle cap and screw, lift the handle off, and pull away any decorative trim sleeve. You’ll see the cartridge — a plastic cylinder sitting in the faucet body. Some cartridges are secured by a retaining clip at the top; use needle-nose pliers to pull it out first. Grip the top of the cartridge firmly with pliers and pull straight up with steady pressure. Note the orientation of the cartridge before it comes out — take a photo. The new cartridge must go in facing the exact same direction or your hot and cold water will be reversed.
Installing the Replacement
Drop the new cartridge in with the same orientation as the original. If there was a retaining clip, push it back into its slot until it snaps firmly in place. Reassemble the handle, turn the water back on slowly, and test. Run both hot and cold to confirm temperature orientation is correct.
How to Fix a Leaky Faucet — Ceramic Disc Type
Ceramic disc faucets almost never need new parts. When they drip, mineral deposits from hard water have built up on the disc surfaces and are preventing a complete seal. The fix is cleaning — not replacement.
Cleaning the Ceramic Discs
Remove the handle screw and lift the handle off. Unscrew the retaining nut and lift the entire cylinder out of the faucet body. At the bottom of the cylinder sit the ceramic discs and neoprene seals. Use a soft cloth or non-abrasive pad soaked in white vinegar to clean the disc surfaces thoroughly. Never use sandpaper, steel wool, or abrasive cleaners on ceramic discs — the precision-ground surface is what makes them seal perfectly and any scratching destroys that. Rinse everything thoroughly before reassembling.
When Cleaning Isn’t Enough
If the discs are visibly cracked, chipped, or the faucet continues dripping after thorough cleaning, replace the entire ceramic cartridge. Ceramic disc cartridges cost $20 to $40 but function reliably for a decade or more with no maintenance. One replacement effectively ends the problem permanently.
Case Study — Kitchen Faucet Dripping for Eight Months
A homeowner with a single-handle kitchen ball faucet ignored a slow drip for eight months before addressing it. The drip rate was roughly one drip every three seconds — moderate by any measure. Over those eight months, the faucet wasted approximately 600 gallons of water. The water bill showed a consistent $8 to $12 monthly increase the homeowner had attributed to seasonal usage without investigating further.
What the Repair Revealed
When the faucet was disassembled, both rubber seats had worn completely flat, one spring had collapsed, and the ball surface showed visible scoring from mineral deposits and metal-on-metal contact. The O-rings had hardened and cracked. A Delta ball faucet repair kit containing all replacement components cost $14.97 at the hardware store. Total repair time was 45 minutes including reassembly and testing.
The Financial Damage From Waiting
Eight months of wasted water at an average US water rate of $0.004 per gallon cost roughly $28 in wasted water charges — plus the $14.97 repair kit — totaling $43. Had the repair been done the week the drip started, the cost would have been $14.97 and nothing more. Waiting cost an extra $28 and produced zero benefit. The repair was identical either way. The lesson is painfully simple — fix it the week you notice it.
The Most Common Mistakes That Make Leaks Worse
Overtightening Everything
More torque does not mean a better seal. Overtightening the packing nut on a compression faucet cracks the stem. Overtightening a cartridge retaining nut strips the threads. Overtightening a handle screw splits the plastic collar. Snug is correct — firm and snug, not maximal force. If water still leaks after reassembly, the problem is a wrong-sized or improperly seated part — not insufficient tightening.
Using the Wrong Replacement Parts
An O-ring that’s 1mm too large won’t seat correctly and will leak from day one. A washer that’s slightly too thin won’t compress fully against the valve seat. A cartridge from the wrong faucet model won’t align with the internal ports. Always take the old part to the hardware store for a direct physical comparison — or photograph the faucet brand and model number stamped inside the body and look up the exact replacement part number online before buying anything.
Skipping the Valve Seat Check on Compression Faucets
A new washer on a pitted or corroded valve seat fails within weeks because the rough seat immediately begins grinding the new washer down. Replacing the washer without checking the seat is the single most common reason a compression faucet keeps leaking after a repair attempt. Run a finger around the seat surface. Smooth means good. Rough or pitted means it needs replacement or resurfacing with a seat grinder before the new washer goes in.
Not Replacing O-Rings While Disassembled
O-rings cost $0.10 to $0.50 each. Disassembling a faucet for a second repair costs 45 minutes. If the faucet is already apart, replace every O-ring in it regardless of whether they look worn — because rubber that looks fine today starts leaking six months from now. This is the single most cost-effective preventative maintenance step in any faucet repair.
Repair or Replace — How to Make the Right Call
Not every leaky faucet deserves a repair. Sometimes replacement is the smarter financial decision — and knowing when to make that call saves both money and frustration.
When Repair Makes Sense
Repair is always the right call when the faucet is less than 15 years old, the body shows no corrosion or cracks, replacement parts are readily available and inexpensive, and the leak comes from a clearly identifiable worn component. Most faucets in these conditions fix permanently for under $25 in parts.
When Replacement Makes More Sense
The National Association of Home Builders estimates the average faucet lifespan at approximately 15 years. Beyond that mark, consider replacement seriously. A faucet that has been repaired multiple times in the same location, shows visible corrosion on the body or valves, has parts that are discontinued or hard to source, or costs more than half the price of a new faucet to repair properly is a candidate for full replacement. Modern WaterSense-labeled faucets use 30% less water than standard models — a replacement pays for itself in water savings within 12 to 18 months in most households.
When to Call a Plumber
Most leaky faucets are genuinely within DIY reach. Call a licensed plumber when the leak is coming from inside the wall rather than from the faucet body itself, when shut-off valves under the sink are seized and won’t close, when the faucet body shows extensive corrosion that compromises structural integrity, when a repair attempt has made the situation worse and water won’t stop flowing, or when the water pressure throughout the house is abnormally high — which indicates a pressure regulation problem that causes faucets to leak and requires professional diagnosis. A plumber charges $45 to $200 per hour. A standard leaky faucet repair runs $100 to $400 for a professional call. Compare that to a $15 repair kit and an hour of your Saturday morning — the math is obvious for any standard repair situation.
Final Word
Knowing how to fix a leaky faucet comes down to one thing before everything else — identifying what type of faucet you have. Get that right and the rest follows logically. The right parts, the right process, the right result. No drip. No wasted water. No monthly bill creeping upward for no visible reason. Fix it this weekend. It costs less than dinner and it lasts for years.